First, choose a migration method and source. When you’re ready to choose which files to transfer and complete the migration.
- After selecting the source, wait for Migration Assistant to check it and display options.
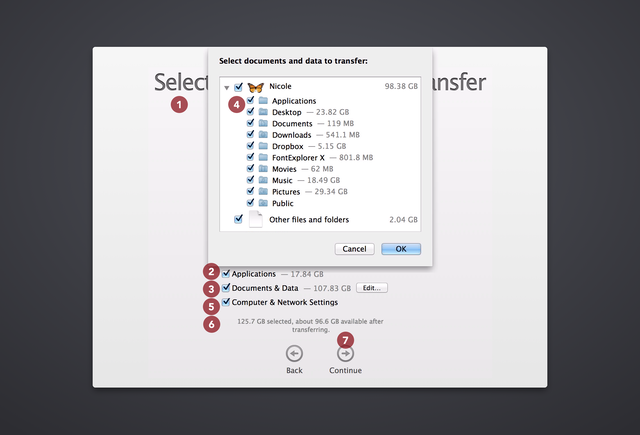
- Transfer applications unless the destination (new) computer already has all the software you need. You will need valid licenses for the apps you transfer.
- Documents & Data contains user files. Click Edit for details.
- Select the user accounts and folders to transfer. A checkmark means all the folders inside (Desktop, Documents, Pictures, etc) will be transferred. A – means some folders inside will be copied. An empty checkbox means the folder will be skipped entirely.
- Select Computer & Network Settings to copy printer configurations and sharing options.
- Make sure there’s enough space on the destination computer for the files you’ve selected.
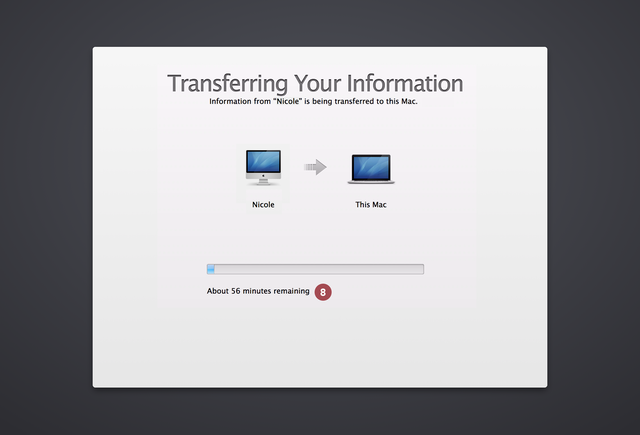
- Click Continue. The migration begins and gives you a rough idea of how long it will take. Wait a few minutes for a more accurate estimate.
- When transfer is complete, turn off the source computer or disk. It remains untouched and fully operational.
- On the destination Mac, log in using a username & password you transferred.
After migration, the new computer is ready to use. But what about the old one? You may keep everything on both computers, or consider deauthorizing iTunes and other software so you can use them exclusively on the new computer. Learn how to delete user files from an old Mac or prepare a Mac for sale or donation.